


Let’s be clear on one point. I love pizza.
As far as I’m concerned pizza is the perfect food. For lunch, for dinner, served cold the next morning for breakfast: a well-made pizza is the ideal combination of meat, veg, and savory sauce, all baked and served on a delicious substrate we call the crust—
And therein lies the problem. Being a Type 1 diabetic, I really need to watch my carb load, and most pizza crusts just blow my carb budget right out of the water and into next week. Thus for a time it seemed to me that pizza was destined to become just a memory: if I stuck to my low-carb diet, I could eat just enough pizza to make me really frustrated that I couldn’t have one more slice.
Then, I came up with this recipe.
The 10-minute low-carb personal pizza
Prep time: ~5 minutes
Cooking time: 10 minutes
Total carbohydrates: about 40 grams for the whole thing!
Required ingredients:
- One (1) “burrito grande” style flour tortilla
- 2~3 tablespoons jarred pizza sauce
- 1 cup mozzarella cheese
Optional ingredients:
What else do you have in the fridge or the pantry?
The secret to this “secret recipe” lies in having most of the ingredients on-hand and in the fridge already, ready to go. In order of construction:
- The crust. Forget pre-made pizza crusts or crust mixes. Buy a bag of “burrito grande” size flour tortillas. They’re about the size of a traditional 12-inch medium pizza crust, but far lower in carbs. Plus, they’re precooked! You don’t need to bake them; you can actually do this in the microwave, if you don’t feel like using the oven. But use the oven anyway: the crust will come out crispier.
- The sauce. Yes, I love to make a good red sauce from scratch, but for this a jarred sauce will do, as you’re only going to be using 2 or 3 tablespoons of it. I prefer Green Mill sauce when I can get it, but Contadina Pizza Quick is entirely adequate. Buy whatever is on sale. Experiment with different brands to find one you like.
- The cheese. You can buy a block of cheese and shred it yourself, if you’re a masochist, but a bag of shredded cheese from out of the dairy case will do, as long as it’s mostly mozzarella. If you want to get fancy you can add romano, asiago, provolone, parmagiana, or any of the other vowel-intensive Italian cheeses, if you like, but the essential ingredient is mozzarella. Some people even like to add a little shredded cheddar. I don’t know why.
If people are interested, I suppose I could do a gluten-free chicken and artichoke alfredo pizza in some future column. - The meat. Apologies to the vegans in the crowd, but for me, a pizza requires meat. I’ll buy a bag of sliced pepperoni from time to time, and if you do that you’re good to go, but I prefer to buy a pound of bulk Italian sausage (Toscano, if I can get it), cook it, crumble it, and then store it in the fridge. Crumbled Italian sausage is wonderfully useful stuff to have on-hand for pizzas, calzones, frittatas, or just to be stirred into scrambled eggs, provided you keep it frozen, or if refrigerated, you remember to use it within a few days after cooking it.
With those ingredients in hand, it’s time to make pizza!
Step 1: You will be using the lowest rack in your oven, so move the racks as needed. Preheat the oven to 425° F.
Step 2: If you’re a Philistine and using non-stick cookware, skip this step. Otherwise, give your baking pan a light spritz of Pam. This keeps the crust from sticking to the pan and makes it come out crispier.
Step 3: Throw a tortilla on the baking pan. If it makes you feel better you can spin it up in the air a few times to pretend you’re hand-tossing it, but it’s not really necessary.
Step 4: Sauce it. This is the tricky step. If your sauce of choice is thin and watery, use less sauce, otherwise the crust will come out soggy. If your sauce of choice is thick, feel free to use a little more. I’ve actually done pizzas with jarred marinara sauce in a pinch, and it doesn’t turn out too badly, as long as I don’t oversauce it.

Step 5: Cheese it. Spread a generous portion of your cheese of choice over the sauce. Then a little more. No one ever complains that there’s too much cheese on the pizza. Finely or coarsely shredded, it doesn’t matter. It’s going to melt anyway.

Step 6: Meat it. Just meat it. Put a generous portion of your pre-cooked protein of choice on the pizza. If you’re using pepperoni it’s tempting to lay the slices out in an amusing or artistic pattern; so what they heck, why not? DO NOT USE RAW MEAT! This is going to be toasted, not in the oven long enough to thoroughly cook raw meat!

Step 7: Anything else? For the pizza at the top of this column, and I diced up some green pepper. I was out of fresh green pepper when I shot the rest of these photos, so I just used some diced onion and sliced fresh mushrooms. I prefer sweet white onions—Vidalias, if I can get them—and find red onions overpowering.

If you used canned mushrooms instead of fresh, drain them thoroughly, and remember that they’re still going to hold a lot more moisture than fresh mushrooms. You may need to adjust the cooking time accordingly.
Anchovies are optional, and an acquired taste.

Step 8: Pop it in the oven. By this point your oven should have let you know that it’s finished preheating, so slide the pizza pan into the oven, on the lowest rack.
Bake for approximately 10 minutes.
Watch it closely, especially in the last two minutes. Given that you’re using a pre-cooked tortilla instead of raw dough or a thicker pre-cooked pizza crust, it can go from yummy and delicious to burnt to a crisp in about 30 seconds.
Step 9: Pull it out of the oven. When the edges of the crust are a nice toasty brown and the cheese is melted and bubbly throughout, pull it out of the oven, and give it a minute to rest.

Step 10: Enjoy! Assuming you remembered to spritz the baking pan with Pam in Step 2, the pizza should just slide right off the baking pan and onto the serving dish, if you’re using one. No scraping required! The underside of the crust should be a nice crispy light brown.
Cut the pizza as amuses you. (It’s easier to cut if you’ve given it a minute to cool.) If you’re a traditionalist, you can cut it into four or eight wedges. Weirdly enough, though, I’ve found that if I cut it into sixteen squares, like this—

—it feels like I’ve had more to eat, even though it’s the exact same volume of food.
And this is how we make a pizza here at Casa Calamari, when we want something better than frozen and don’t have the patience to wait for delivery. If you feel like trying this recipe, let us know how it turned out for you. If you’d like to see more columns like this, let us know.
And above all, don’t forget—
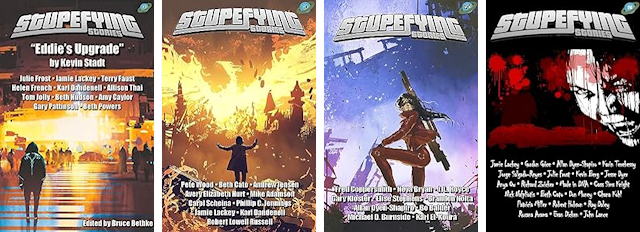
It’s not all food and fun here at Rampant Loon Press. We also publish a magazine; you should check it out. It’s free for Kindle Unlimited subscribers, and you can get the four most recent issues with just one click.
(Or you can get just one at a time, if that’s what you’d really prefer.)
1 comments:
Tortilla pizza is awesome. Seriously, it’s easy without such elaborate instructions.
Post a Comment